
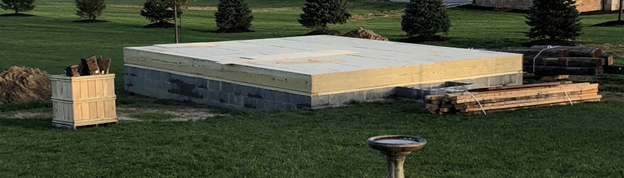
 Cabin floor framed and ready to start installing the logs[/caption]
From here, I started with the bottom log and because it was in the hardware store the bottom log was already cut flat, so I could use it with modern dimensional lumber. Most of the bottom logs were installed with my father-in-law using no modern equipment and with manual labor. My dad helped me frame in the door and window openings, and I pinned the corners with a lag screw. Since all the logs were numbered and labeled (this step was extremely important) from when I disassembled the cabin, I was able to get the logs back to the right placement. It didn’t take long for the cabin to take shape, and with modern equipment like a skid steer with forks, I was able to have the logs in place in probably four working days or a month's time frame for me since I was only doing this one day a week.
Cabin floor framed and ready to start installing the logs[/caption]
From here, I started with the bottom log and because it was in the hardware store the bottom log was already cut flat, so I could use it with modern dimensional lumber. Most of the bottom logs were installed with my father-in-law using no modern equipment and with manual labor. My dad helped me frame in the door and window openings, and I pinned the corners with a lag screw. Since all the logs were numbered and labeled (this step was extremely important) from when I disassembled the cabin, I was able to get the logs back to the right placement. It didn’t take long for the cabin to take shape, and with modern equipment like a skid steer with forks, I was able to have the logs in place in probably four working days or a month's time frame for me since I was only doing this one day a week.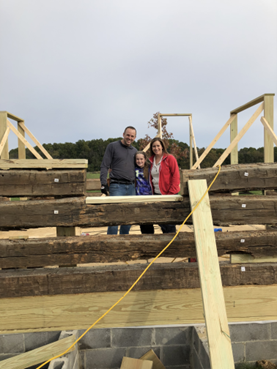 [caption id="attachment_38701" align="aligncenter" width="340"]
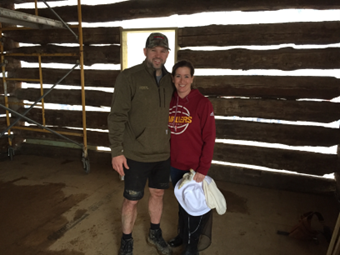 Installing the logs and building the structure[/caption]
It was late in the fall at this point, so I wanted to get the cabin as covered as possible. I recruited a friend from church again to frame out and install a steel roof on the cabin. Just because I loved the work and process so much, I jumped in and helped as much as I could. When winter hit, I just tried to cover up the cabin as much as possible until spring hit again. As it started to warm up, it was time to start chinking. I can say I really wasn’t looking forward to this part because I knew it would take a while, but I never dreamed it would be as difficult as it was. Thankfully a friend of mine from Hartville Hardware had also put a cabin together and helped me get the process of chinking started.
The chinking process taught me a lot about myself and gave me an appreciation for the past and how our ancestors would have built 150+ years ago. There are a lot of different materials you can use for chinking, but I found the easiest and the look I liked the most was simply mortar with water. I know it’s not authentic, but I really liked the gray with the browns on the cabin. My process with the chinking was to install a wire mesh on one side of the cabin in between the logs and then to install the mortar on the mesh and smooth it out with a wet sponge. I then insulated the inside of the mesh and installed the mesh on the other side and repeated the process on the other side. The chinking process literally took us a year of working.
After the chinking, it was the inside finishing touches, and thankfully with my wood burning fireplace, I could at least keep from freezing. During the winter I was able to complete the flooring, trim the openings, and finishing the loft. A wood burning fireplace does not adequately heat my cabin but a wood burning stove would easily heat the cabin (I have my great grandma’s old one in the cabin but a new stove would be much more efficient).
Installing the logs and building the structure[/caption]
It was late in the fall at this point, so I wanted to get the cabin as covered as possible. I recruited a friend from church again to frame out and install a steel roof on the cabin. Just because I loved the work and process so much, I jumped in and helped as much as I could. When winter hit, I just tried to cover up the cabin as much as possible until spring hit again. As it started to warm up, it was time to start chinking. I can say I really wasn’t looking forward to this part because I knew it would take a while, but I never dreamed it would be as difficult as it was. Thankfully a friend of mine from Hartville Hardware had also put a cabin together and helped me get the process of chinking started.
The chinking process taught me a lot about myself and gave me an appreciation for the past and how our ancestors would have built 150+ years ago. There are a lot of different materials you can use for chinking, but I found the easiest and the look I liked the most was simply mortar with water. I know it’s not authentic, but I really liked the gray with the browns on the cabin. My process with the chinking was to install a wire mesh on one side of the cabin in between the logs and then to install the mortar on the mesh and smooth it out with a wet sponge. I then insulated the inside of the mesh and installed the mesh on the other side and repeated the process on the other side. The chinking process literally took us a year of working.
After the chinking, it was the inside finishing touches, and thankfully with my wood burning fireplace, I could at least keep from freezing. During the winter I was able to complete the flooring, trim the openings, and finishing the loft. A wood burning fireplace does not adequately heat my cabin but a wood burning stove would easily heat the cabin (I have my great grandma’s old one in the cabin but a new stove would be much more efficient).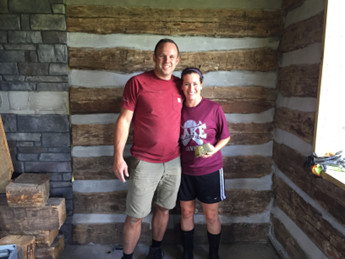 [caption id="attachment_38702" align="aligncenter" width="251"]
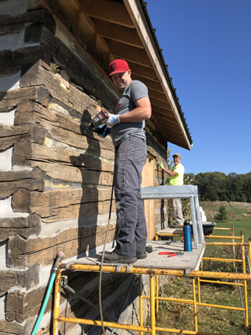 The chinking of the cabin and definitely the toughest part of the process[/caption]
Through it all the thing I needed the most was all the support I received from family and friends because I couldn’t have done it on my own. My wife helped big time, my parents helped, my brother and brother-in-law, and of course my father-in-law who was right there through it all with me. No matter how my father-in-law felt he was always excited, or at least he acted like he was, to help. I really drew close to him during the process and his servant heart comes right from his faith in Christ, thank you Paul.
The chinking of the cabin and definitely the toughest part of the process[/caption]
Through it all the thing I needed the most was all the support I received from family and friends because I couldn’t have done it on my own. My wife helped big time, my parents helped, my brother and brother-in-law, and of course my father-in-law who was right there through it all with me. No matter how my father-in-law felt he was always excited, or at least he acted like he was, to help. I really drew close to him during the process and his servant heart comes right from his faith in Christ, thank you Paul.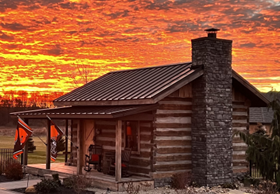 [caption id="attachment_38704" align="aligncenter" width="287"]
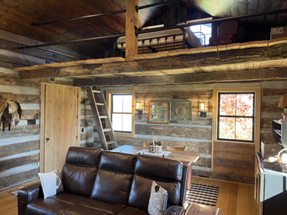 Finished product of the cabin[/caption]
Other products I intend to buy for the cabin but haven’t pulled the trigger on:
Composting Toilet
Lehman's Stove Fan
Fireset Tools
Firewood Carrier
Note: Did you miss Part 1 of this series? You can find it here.
Zach Coblentz
330-620-9589
zcoblentz@hrm-enterprises.com
“I love to hear from customers – “Give me a call, send me a text or shoot me an email about your experiences with one of our family of businesses.”
Finished product of the cabin[/caption]
Other products I intend to buy for the cabin but haven’t pulled the trigger on:
Composting Toilet
Lehman's Stove Fan
Fireset Tools
Firewood Carrier
Note: Did you miss Part 1 of this series? You can find it here.
Zach Coblentz
330-620-9589
zcoblentz@hrm-enterprises.com
“I love to hear from customers – “Give me a call, send me a text or shoot me an email about your experiences with one of our family of businesses.”


0 Comments